


Eco Printing Process - Botanical Alchemista
Eco-printing is the combination of nature and alchemy where a technique where plants, leaves and flowers leave their shapes, colors, and marks on fabric or paper. Plant material bundled inside of cloth or paper is steamed to release the dye found naturally inside the plant, creating a contact print in the shape of the leaf or flower used. These contact prints are referred to as “Eco Prints.”
Mordants
*Never handle fine powders without a face mask. Do not use mordants without gloves.
The word mordant is from the French and translates loosely as “to bite”. The mordant serves the chemical purpose of fixing botanical color/print to the substrate as permanently as possible. Remember this is Nature we’re working with. The potential to fade and change is ever-present.
Mordanting a substrate before printing on it increases the change that it will be stable over time. In this class, we are using Alum Acetate as our mordant because we are printing on paper, a cellulose fiber. Aluminium based mordants are called sunny mordants, the interaction of Alum with the natural tannins in leaves brings out yellows and bright greens.
Alum Acetate
This mordant is effective for cellulose fibers. Alum acetate is the combination of two separate ingredients: alum sulfate and sodium acetate. When you mix the two together the result is alum acetate.
When eco printing on cellulose fiber (paper or cotton fabric): In a large plastic or glass container, dissolve the powdered mordant in water and soak your substrates in it for at least an hour.
Ratio: One tsp powdered alum acetate to one quart hot water. Or for larger batches dissolve 1 tbsp in one gallon of hot water.
Alum (potassium aluminum sulfate) is generally used to a 15% concentration.
This mordant is most effective for protein fibers (wool, silk, alpaca). Food grade versions are used as firming agents in processed foods, in pickling, and for water purification.
Example: if you are mordanting 100g of wool, you will use 15g of Alum to mordant it. If you are mordanting 200g of wool, you will use 30g of Alum to mordant it. (And so on... )
- Turn on the scale
- Put the small bowl on it, tare it (calculate the difference between empty bowl and bowl with alum)
- Weight the alum until you get the required amount.
- Fill your mason jar with boiling water.
- Pour the Alum in the water, and stir with the wooden spoon until Alum is fully dissolved.
- Empty this Alum solution in your stainless steel pot and add cool water (Enough so that it will cover the yarn or fabric you wish to mordant)
- Put clean yarn or fabric in the pot. Add water if needed.
- Turn on the stove to medium. Bring to a simmer and hold there for an hour.
- Leave for a minimum of 30 minutes and up to 1 hour, stirring occasionally to insure even absorbtion of mordant in the yarn/fabric. Do not boil. When you stir do it very slowly, as heat and agitatiuon causes felting of the wool (If silk to not go above 80 celcius degrees as it damages the fibers.)
- When finished, turn off the stove and let cool down and hand your yarn or fabric to dry OR You can also use them right away in a dye pot.
Modifiers
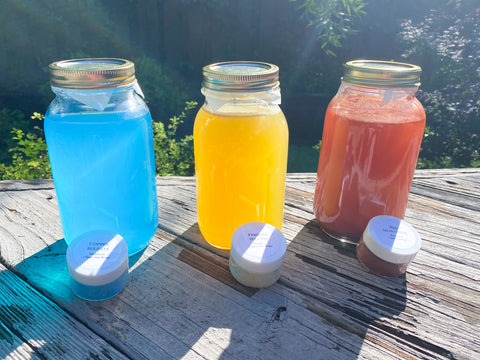
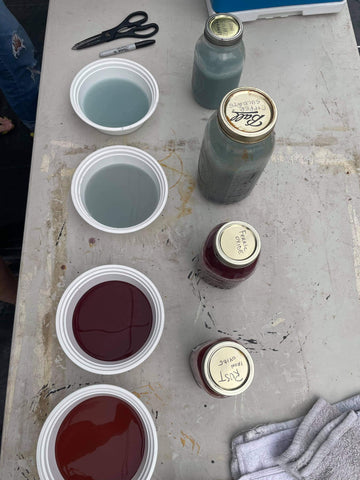
A modifier is a chemical used to change the color of the printed botanical (it affects the tannins in the plant). It can also bring out more detail. After soaking your fiber in a stabilizing mordant, you can dip your botanical in one of the modifiers to achieve different results in your print. In our class we will be using Copper Sulfate, Ferrous Sulfate, and Iron Oxide (rust).
Copper Sulfate
Make this by putting pieces of copper in a glass quart jar with white vinegar for a few weeks. The vinegar will turn blue and will last indefinitely.
Ferrous Sulfate
Make your own by adding a bottle of iron tablets to a glass quart jar of distilled water. The water will turn blue and will last indefinitely.
Iron Oxide (rust)
Make your own by putting a handful of large nails or other iron objects in a glass quart jar of white vinegar for a few weeks. The rust solution will last indefinitely.


Creating a Bundle
Aluminum plates and binder clips are the most reliable way to build bundles that will ensure the direct contact required for perfect prints. You can also use thick cardboard and rubber bands but they tend to shrivel during steaming.
Lay down an aluminum plate, lay down a piece of mordanted paper, lay down a botanical, lay down a piece of parchment paper, lay down a piece of felt, lay down a piece of parchment paper, lay down a piece of paper and repeat. You want your bundle to be about 6 layers thick – less if the botanicals are more three dimensional. Add your clips on all 4 sides. If you want a double print, you can skip the parchment paper between the layer of botanical. For example – paper, botanical, paper, then parchment paper then felt. This will give you a front print on one paper and a back print on the other paper.

Setting up the Steamer
Add water to a large Aluminum, stainless steel lidded canning pot and put the inner rack inside. Fill the steamer with water to just below the rack. Raise the heat and steam the bundle at a simmer (maximum 180° F / 80° C) for two hours. Add bundles to the steam pot, then lay a towel over the pot and put the lid on - steam for two hours. Turn the bundle after an hour using tongs.Continue to monitor water level – don't let it boil dry.
Unbundling and Stabilizing Prints
When you take the bundles out of the pot, allow them to cool. They are still wet, a little fragile and prone to tearing. Be careful as you separate sheets to pull off the botanicals. You will find that a pair of tweezers can be helpful in removing any debris.


It’s a good practice to rinse prints at the end of the printing session, in order to remove any chemical residue that could shorten the lifespan of the print. Rinse prints in cool running water and lay them flat to dry, with plenty of air circulating – as opposed to stacking them. Once the prints are dry, press them with the steam iron, using parchment paper to protect them, and then stack a few at a time and weight with books or heavy bricks.
Clean Up
All spent mordant baths should be disposed of down a toilet or work sink, not the kitchen sink. This avoids splashes in areas where food is prepared.